Marie
So I recently made mugs! I could make mugs all day long. I really enjoyed making mugs for class. I can't wait to glaze them. Here they are for now.


We also made altered cylinders which is the same thing as a vase.  I like throwing vases too. Here are all my vases, as well as one of my decorated cylinders.


I have now moved on to bowls and plates. Everyone talks about how much they love trimming, guess I am the odd one out. Right now I find it tedious and time consuming. Maybe once I really get the nack for it I will enjoy it but until then, no thanks.


However I currently can throw a bowl in about 10 mins or less. That is impressive for me.
Marie
After a wonderful short two weeks, I am yet again back in the ceramic studio for class. As if I didn't have enough trouble making cylinders at the end of the semester last time, we are starting with cylinders. I feel like it is a big dejavu moment. This time however they need to be taller and of course straighter and better and all together awesomeness!

To make my inability to make awesome cylinders worse, I actually missed two days of class due to a nasty bacterial infection. Not fun. All I could think about was how I wasn't going to be able to catch up, how I would never be able reach 8 inches of greatness let alone the 10 inches I need on some of them. However after going back on thursday last week, I some how managed to rock it! I created four cylinders all over 8 inches! It must have been all the prayers I made begging to be able to do it. Now that I have cylinders down I am moving on....

Tada! 10 cylinders 6 of which are 8 inches and the other 4 are 10 inches!
Marie
I feel the end of the semester closing in upon me quickly. I have spent countless hours outside of class time in the studio, working on projects to complete them in time. I finally feel that they are complete or at least as complete as they are going to be!

I went in Wednesday and threw on the wheel. I was there all day long, one to eleven. I made some pretty good cylinders, or at least I thought so. The only problem is we were supposed to throw 6 total: Four of the six being six inches and two of the six being eight inches.

I never got one that I like that was eight inches. I got up to eight inches but I never liked the way it looked. So I would then try and try to fix it, but my clay would become fatigued and then it would crumble down. I did have 2 seven inch ones I turned in.


Over all throwing on the wheel was very difficult to learn. The main thing to remember is centering your clay on the wheel is the most important. I am no expert yet but I am taking another ceramics class over summer and all I will be doing is throwing on the wheel. Hopefully by the end of summer I will get something over eight inches that I feel is worthy to keep and not mess with until it falls apart!

Check out this video of someone throwing a cylinder type pot. He makes it look so extremely easy. The steps he is doing are the basic steps that I was doing this past week.


Moving on to the reliquary piece, I put my under glaze on it yesterday. This is actually the first time I have used under glazes in any of my pieces because the Peru Mouse Bottle with Nugget was terra sigillata. The Barbra Hepworth inspired piece was acrylic. I am glad I have been able to use so many different ways to cover the pieces. I like to soak up as much info as I can on this stuff.


Using the glazes was actually relatively easy. They mix up just like paints do, so it is fairly simple to get the colors you need. I can’t wait to see it fired. Once I see it fired I will decide whether or not to use a patina on the pedestal/column thingy. I am thinking I want it to look older and worn so that will require the patina.


Remember this is a reliquary to hold my Pisces spirit. I think that it is totally cheesy but I like cheesy.

For one of my other classes I have had to make a website, which features more of my artwork. You can click on the link below but it is also located under the links column.


http://www.wix.com/mariejernigan/Marie-Jernigan
Marie
My Peru bottle is done. It has been almost all semester but it is finished! That is one thing I have learned about ceramics, everything takes a long long time. Hand building is time consuming, the piece drying is time consuming, and if your glazes are detail guess what? You got it, time consuming! But I still love ceramics and will enjoy doing three-dimensional pieces for the rest of my life. I also love the fact that I will never have to have a “normal” job if I don’t want. Ah, my love of art.

The part that was supposed to be black didn't turn out that way. The red terra sigillata that we mixed the black with needed more black than what was called for.

The Hepworth inspired piece, the second project one is done. I must say that that after all the difficulty I have had with this piece, I didn’t think I would ever like it! But now that it is painted I actually kind of do like it.
This piece broke in the process of moving it to the kiln. Since that happened and all the terrible cracks (I did not like the clay I was using), I had to glue it back together with Elmer’s glue and some grog mix. Grog? Well that is pulverized fired clay. So it is fine particles fired.


Looks great though right? You can’t really tell where it broke so that is all I need.


My coral reef is all put together. I need to add the texture to the Christmas tree worm and the tubes. The springing (all the texture for the reef part) took the longest. But I am quit happy with it.

I will be even happier with it if after it is bisque fired the glazes all come out bright and pretty. That will be this week some time.


Recently I have learned to throw. Now you see other people do it and they make it look so easy. Unfortunately, it is not in any way shape or form easy to learn. The assignment is to throw 6 cylinders. Four of them need to be 6 inches after shrinkage, and 2 of them being 8 inches after shrinkage. I currently have 2 over 6 inches. They are due tomorrow. So guess what I am about to go do? Yep, got to go throw down on the wheel!
Marie


These are some stunning pieces of jewelry and metal work, right?


Surprise! They are not metal at all, well kind of. Turns out all these pieces are made from a medium called PMC or Precious Metal Clay. It was first formulated in Japan by the Mitsubishi Motor Company. It has fine particles of silver mixed into the malleable materials. It mold just like clay. Once it is fired in the kiln, the silver melts and creates a fully metallic object. It is pretty neat stuff. The thing I find, is when I learn about new products, or materials, I become curious. So curious that I would love to work with the piece to see how it truly handles. I want to see the extent to which I can push it. PMC is on my list (and it is a long list) to try.


Raku
While it might sound like some sort of Asian food dish or Asian Pop Culture deal, it is not. At the end of this semester, our final project in ceramics is Raku firing. I am looking forward to it! Raku is also developed by the Japanese. I have been at school before when they do Raku firings, and am very optimistic about doing it myself. The Raku firing has a very distinctive smell. Some call it nauseating but I call it wonderful! It smells of campfire and clay.

The appeal of the Raku is its aesthetics. It is usually always full of color and shiny. The colors can blend and merge with each other, creating a beautiful piece, although sometimes it can look a little cheesy. In most cases, Raku gives off this metallic look. Each piece fired will be unique; they never turn out the same. You do have to be careful with Raku firing. It tends to have thermal shock and may explode in the kiln (which is due to the natural process of the firing).

Other than pottery

What really fascinates me are some of the artist out there working with ceramics, that don’t make their pieces just pottery. Ceramics is really a versatile medium and can create amazing abstract and even naturalistic pieces. For instance look at some of Tip Toland’s work. The ability to make it look so much like a real human is remarkable. Tip even goes so far as to use synthetic hair for the pieces. I really love what Tip Toland is doing! I don’t know if I would have the patience for it!


Marie
I finally finished putting Norris on to my Peru vase. Lots of little Norris’s all over! Well, three of them anyways. Using the terra sigillata was a little different than the glazes. It was definitely more thin than most the glazes. I had to be careful to not get too much on the brush, other wise it would get all over the place.


I am very excited to see how it will turn out. When I was using the black it was very similar to the dark red. There was only a subtle difference between the two. It was very difficult to distinguish them from each other when they were painted on. Once the piece is fired in the kiln, the black will be very rich.
The Line around the neck of the piece is the black, where as the red the inner stripe after the white!


I was looking at various ceramic artist and I came upon Jennifer McCurdy. All I can say is WOW! Her pieces are absolutely some of the most stunning pieces I have seen in a long time. She does her pieces thrown on the wheel. The wheel is something that takes practice, years of it. As you can tell by the amazing visual effects of her pieces she is a master potter. She uses translucent porcelain then fires it high fired at cone 10.


For my coral reef piece, I am looking at various columns as the base. I am leaning prominently towards the ionic columns. I looked at Corinthian columns but I am afraid that they would over complicate the top part of the piece where the coral reef will be. However, if I could arrange it in such a way as to make it look like the coral reef was actually part of the flowery look of the Corinthian column, it might look alright.
Ionic column

Corinthian Column

I was watching the Discovery Channel’s show Life. It is a fascinating show. I really think the videography is amazing! This particular episode was about deep sea creatures and it had a part about coral reefs. It had an animal on it that I have to use. I loved the way they burrow into the reef then spread open. I can see why they are called a Christmas tree. I have to say the textures and the colors in the reefs are amazing. I am not sure the name of this plant but just look at the textures all over. I love it.
Christmas Tree Worm
Marie
I am now on the journey of using terra sigillata to begin the decorating of Nugget and finally Norris, the moon animal will be on the piece. So what exactly is terra sigillata?

Terra Sigillata is what the ancient world used before they had modern day glazes.It is a mixture of dried clay and coloring and water. It comes in mainly white, creme, black, red, and brown. For instance, the Greeks red and black vases are a prime example of this.

There are specific formulas for it, like a recipe for cooking. The one that I made the other day, for instance, had to have 28 pounds of water to 14 pounds of dried ground up, powder form clay. Then after mixing the terra sigillata, we had to let it set. It takes anywhere from 48 hours to 5 days to set the mixture just right. Once it is set there are three distinctive layers in the bucket. The top coat is the water that has pulled to the top, the bottom is left over clay sedatives, and the middle is the good stuff. The middle is the terra sigillata. This is what is used to decorate the pots.

Everything in the ceramics world takes a while to dry. So before I can begin glazing my second piece inspired by Barbra Hepworth it has to dry, which means I am moving on to another piece.


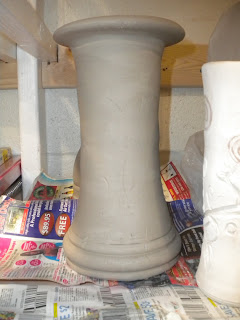
I am now in the process of building a reliquary, but not your ordinary square box with decorations on it. I am making something to hold my Pisces spirit. What better for a Pisces spirit than a coral reef! Clever right? Well I thought so. In order for it to look important and not like a diorama I am morphing it with what will be it’s base. The base will be an ionic column, with curvy flutes. What I am most excited about is the experimentation I will get to do with texture, and once it dries out enough, the bright colored glazes I will get to use! Bright colors make me so happy. Don’t believe me? Take a peek at the bedroom I painted Sunkist orange.

The little curly plants in the picture below is what inspired me for the ionic columns.

While I am working on this Coral Reef Reliquary, I am using recycled clay. Yep, I said recycled clay. I had no idea you could do this, but turns out you can. You take pieces of dried up, hard clay then soak it in water. The water puts the moisture back into it. Then you use a machine called a pug mill.

This is an example of a pug mill. The tube coming out of the right is the clay!

As you are putting the clay into the pug mill you make sure there are no random items in it, like a spoon, or rubber ribs (we found these when we were using the pug mill). The pug mill, with the mixture of grog (pulverized fired clay or even temper), push it out into clay bars, which in turn can be reused for more projects. It is very nice to not have to go to the store to get more clay, but to reuse stuff people didn’t need or want. Talk about being green!


Marie
For the past month, I have been steadily working on my inspiration piece from Barbra Hepworth. The original idea came from her particular piece "Wave" 1943-1944.


The way that her "Wave" was circular, and it was enclosed was what really inspired my sketch. Of course, I had to make it my own, and make it relatable to the original Peru Mouse and Bottle piece. So I really wanted to recreate the circular "Wave" but have it sort of double barreled.


Now this has all been easier said than done. Unfortunately for me, I like to make things harder on my self than necessary. What can I say, I like a challenge. First off, I tried making the piece by creating a hump mold, and then draping the clay over it, allowing the clay to dry in the sort of curved angles. Well it did not work, but that is a common theme with this piece. Then I tried doing it opposite of the hump mold and created a slump mold, allowing the clay to sink into the piece, still curving.
My Sketches of the piece


This was more successful so I began to put together each of my pieces. However, the particular kind of clay that I have got from a clay distributor is not as malleable or plastic as the previous kind I had worked with. It began drying quickly and not wanting to really stay in shape of the piece. I then had to realize that I had to work with these pieces lying down horizontally, not vertically as I had intended. As they were lying down on their side, I had to put in slabs of clay as an inner support for the structure.

As I am nearing completion of this piece, my professor, tells me he doesn’t think it is going to work so well and that I needed to finish this one and then start making another one by using the extruder. The extruder is like a big play dough press. You put the template in, followed by the clay then mash it down with the handle and WaaLaa! You have out the other end the shape of clay you need!

So I go ahead and finish up this piece, and it is massive. It is about 50 pounds of clay and twenty-five inches tall (once it is set up right) and about a foot in depth. I am way to weak to lift the thing by myself! Luckily I was able to save this project! I don’t know how I did it, but I was able to manipulate the clay in a way that it worked out! It took so much stress off of me! It makes me so incredibly happy that I don’t have to make it again!

This piece will not be able to stand up vertically on it’s own until after we fire it in the kiln. The reason is because clay has different states that it goes through. As you are working with it, it is plastic or malleable. Then as it begins to dry it reaches this leather hard state where it is tough, and still workable to an extent. This is the state my piece is in right now. But once it reaches the bone dry state, the piece is very fragile. I don’t think the weight of my piece sitting up vertically will be able to withstand the pressures of the gravity while it is in this bone dry stage. So I will fire it lying on its side, and then sit it up. I will have pictures of it up later, after I can sit it up.
Marie
This has been my first experience coiling and pinching to create a hollow piece. The process is quite tedious at first but once you get the hang of it, all the sudden you have to stop building because the clay will be too wet and will collapse if you don’t! Over the period of the past few weeks I have been coiling my piece starting at the base slab of clay. I unfortunately had to make 3 pieces in the time most of the class has had to make one. What can I say I like to make things difficult on myself!


Trying to figure out how we were going to connect the two vases was probably the most difficult part. I had to build up both pots up to about 26 centimeters. Then I had to cut a perfect circle out of the sides of both of the pots. Easy thing to do with the little compass tool we have. I don’t think I can hand draw a perfect circle to save my life let alone 2 symmetrical ones. Anyways after they both have circles in their sides I rolled out a slab of clay and had to squeeze my hand in and the clay into the almost closed pots to connect the two together. After it was in place then I blended with a serrated rib, think of the edge of a serrated knife but in the shape of an oval that has been cut in half.

Once it was put together I had to make Nugget. Nugget had to go on the one side of the pot first; due to the fact that I would have to reach through the hole joining the pots and blend Nugget underneath into the inside of the pot to attach him.To make Nugget, he had to be hollow as well. So it was the pinching process I used for him with some coiling thrown in. Most of the front side of Nugget is coiled while his bottom is pinched into place. I started with the front part of Nugget’s body, followed by attaching, then cutting off and re-attaching his back side. Trying to get him the absolute correct size was near impossible due to the fact that the pictures I had to measure Nugget from where taken at an angle. So Nugget is a best guess when it comes to his length and truth be told he is probably a little long. But that is ok; I think he is cute none the less. I love Nugget’s big ears! They match his personality.

Well, after attaching Nugget the rest was history, just adding on the neck to the other vase. Overall I am extremely happy with the way it turned out. I think considering this is my first time coiling and making the piece hollow I did remarkably well. I am happy with it and as long as I like it that is all that matters! After all it will be sitting in my house right? Yes and I just realized that Nugget is on the wrong side of the pot! Ooops!

Now let’s hope it does not blow up in the kiln. Not likely to happen all the time but it does happen due to air bubbles in the clay that pull the water into it creating a pressure that can screw your piece up by going ka-ploo-ee! So I am hoping that I was able to apply enough pressure using the serrated rib to get rid of any air bubbles. Nugget protect your pot and be brave!


For the next part of the project, we have to design how the piece would look if a modern (1900 and up) artist were to design the piece. I am inspired by Barbra Hepworth. Take a look at some of her work. Just Google and up pops her stuff. Completely abstract and beautiful! I am totally inspired for this piece!


http://www.nmwa.org/collection/profile.asp?LinkID=858